- Home
- Easy Knitting Patterns
- Baby Sleep Sack
Baby Sleep Sack Knitting Pattern
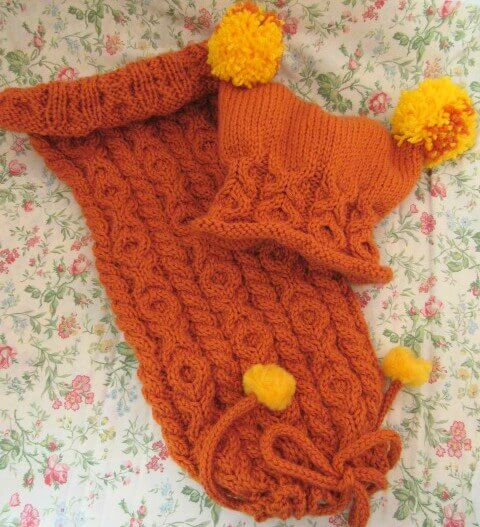
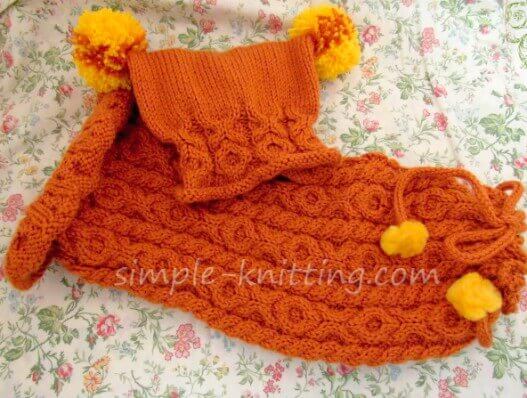
This baby sleep sack knitting pattern is the perfect little baby gift for a special little one in your life.
And it's a perfect baby pattern if you love knitting cable stitches. It can also be a fun knitting challenge for some of you too.
I used a regular 4 stitch cable stitch and the OXO cable stitch pattern in this baby cocoon knitting pattern.
And the OXO cable stitch pattern is so adorable for a baby.
I made it with the idea of being able to swaddle your baby, keeping the baby nice and warm, snug as a bug in a rug.
A knit baby cocoon is made by knitting a tube so it's quite easy to knit. In fact it's similar to my simple knit scarf pattern. Only it's a lot shorter.
It's not overly wide but rather just right to swaddle a baby so he/she feels snug and secure.
Worried about the cable stitch knitting?
Don't be. I've left you links to my knitting cables lesson page and also for the OXO cable stitch pattern in the knitting pattern notes.
You can even practice them before you start knitting this pattern.
Challenge yourself. I just know once you try knitting cables you'll discover how easy they are to knit. Just go for it, you can do it!
And keep in mind that the cable stitch knitting is only done on every 4th row. The rest of the rows are simple knit and purl stitches..

It's a nice change and a refreshing challenge for some of you. It's honestly not that difficult.
The baby hat knitting pattern is also knit on circulars and then closed at the top.
And you have a choice to simply bind off at the top of the hat and seam it.
Or you can use the Kitchener stitch and I've included a knitting video further down the page to help you.
I hope you enjoy this baby cocoon knitting pattern as much as I did creating it.
Click on this link to download the sleep sack knitting pattern
Baby Sleep Sack Knitting Pattern Details

Required Skills: Knit, purl, cable knitting, circular knitting
Sleep Sack Circumference: Approximately 17 inches not stretched and at least 24 inches stretched.
Sleep Sack Length: 21 inches.
Hat Size: To fit head circumference up to 16 inches and is very stretchy
Gauge: 5 sts per inch over Stockinette Stitch
Needles: US 10 (6.00 mm), 16 inch circular knitting needle
Materials: 4 - Medium (Worsted) Yarn. I used Cascade Pacific (60% Acrylic, 40% Superwash Merino Wool)
Each ball is 190 yards / 173 m and I used almost 2 balls for the sleep sack and a new ball for the hat.
Abbreviations:
K, k = knit
P, p = purl
cn = cable needle
sl = slip
st, sts = stitch, stitches
Rnd = round
YO, yo = yarn over (bring yarn to front of work as if to purl)
K2tog, k2tog = knit 2 sts together
Notes: I used two cable stitch patterns in the baby sleep sack, one is the XO cable pattern or hugs and kisses cable stitch.
The other cable stitch was from my knitting cables page and it's a simple 4 stitch cable stitch pattern.
The OXO cable stitch pattern is worked over 16 rows and I knit it 7 times to reach 21 inches in length.
It works up quite quickly once you’ve gone around a couple of times.
Baby Sleep Sack Knitting Pattern
Using the long tail cast on, cast on 112 sts and join in the round being careful not to twist the stitches
Knit 6 rounds to create rolled edge. Then proceed as follows:
Rnd 1 - 3: *P2, knit 4, p2, knit 8, repeat from * around
Rnd 4: *P2, sl next 2 sts to cn and hold in front, k2, then k2 from cn, p2, slip next 2 sts to cn and hold in back, k2, then k2 from cn, slip 2 sts to cn and hold in front k2, then k2 from cn, repeat from * around
Rnd 5 - 7: As row 1
Rnd 8: *P2, sl next 2 sts to cn and hold in front, k2 then k2 from cn, p2, sl next 2 sts to cn hold in front, k2 then k2 from cn, sl next 2 sts to cn and hold in back, k2 then k2 from cn, repeat from * around
Rnd 9 - 11: As row 1
Rnd 12: As row 8
Rnd 13 - 15: As row 1
Rnd 16: As row 4
Continue in pattern until work measures approx 21 inches or desired length.
Next Rnd: Knit row 1 of pattern, two times
Eyelet Rnd: YO, k2tog around
Knit 3 more rounds and bind off loosely.
Finishing Knitting
Weave in ends.
You have a choice here. You can make an I-cord tie and thread through eyelets at bottom of sack.
Or you could use ribbon if you prefer. Add little pom poms if you wish or just leave it plain.
Matching Baby Hat Knitting Pattern
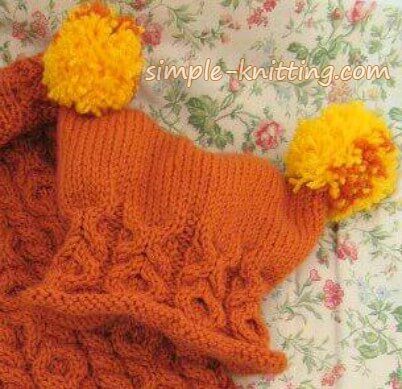
The baby hat knitting pattern is also knit in the round and closed at the top.

But don't worry you can seam it closed or use the Kitchener stitch.
I've included a video below to help you with the Kitchener stitch.
Or as I mentioned you could bind off all stitches at the top and seam it.
Whatever works for you.
I've become a fan of the Kitchener stitch as it is a completely invisible seam and it's also kind of fun to do.
I worked the 16 row XO cable pattern once for the hat and the rest was simply knit.
Cast on 80 stitches and join in the round being careful not to twist sts.
Knit 6 rounds, then proceed as follows:
Rnd 1 - 3: P2, K8 around
Rnd 4: *P2, slip next 2 sts to cn and hold in back, K2 then K2 from cn, slip next 2 sts to cn and hold in front, k2, then knit 2 from cn, repeat from * around
Rnd 5 - 7: As row 1
Rnd 8: *P2, sl next 2 sts to cn and hold in front, K2, then k2 from cn, sl next 2 sts to cn and hold in back, k2, then k2 from cn, repeat from * around
Rnd 9 - 11: As row 1
Rnd 12: As row 8
Rnd 13 - 15: As row 1
Rnd 16: As row 4
Rnd 17 and onward: Now just knit around until hat measures 7 inches.
Two binding off knitting choices:
1. Kitchener Stitch – use this stitch for binding off and creating a seamless hat. Knitting video is below showing you how to knit Kitchener stitch.
2. Bind off loosely and seam the top of the hat.
To Finish Knit Hat
Weave in ends and add pom poms or tassels or whatever your preference is.
Wrap up your precious little one and enjoy!
Kitchener Stitch Knitting Video
Happy Knitting!

