- Home
- Knitting Instructions
- Slip Knot
How to make a slip knot
The first step in how to begin knitting
While many of you may already know what a slip knot is and how to make one, I want to make sure you all know by giving you a very easy knitting lesson.
As soon as you have decided on the knitting yarn and your very first pair of beginner knitting needles you'll want to know how to start knitting and this is it.
You start off knitting by casting on stitches to your needle and the slip knot it basically the starting point.
So I'll explain a little further about these simple little loops so that you're familiar and then I'll get on with showing you how to make one.
First of all I'll answer some questions about this handy little loop.
what is a slip knot?
A simple slip knot for knitting is a type of loop that can slip apart simply by pulling one end or tightens back up by pulling the other end. It's also called a slip loop which makes more sense to me.
what's the purpose of a slipknot?
Basically it's a starting point for casting on stitches and starting to knit.
so does the slip knot count as a stitch in knitting?
Yes absolutely, it's your first stitch of the cast on
and do i knit the slip knot?
Yes you do, it's the first stitch of the cast on and you just knit it.
Is there a benefit to using a slipknot?
The main benefit for knitting purposes, is that it securely fastens the yarn to the knitting needle creating a nice foundation for your stitches.
I think another simple benefit is that it either tightens or falls apart easily if needed.
Plus a slip knot is very handy to use when adding new yarn to knitting.
By simply taking the strand of new yarn and making a slip knot around the old yarn strand, it helps keep the yarn secure as you continue on knitting with the new ball.
So it acts as a kind of stopper so that the yarn doesn't slip off the needle.
Can A slipknot come undone?
Yes, being a slip knot it can work its way loose so make sure to snug it up on your needle.
And more importantly make sure to secure it more thoroughly later on when you weave in the ends of your finished knitting project.
So let's get started...
how to make a slip knot Knitting Tutorial Step by step
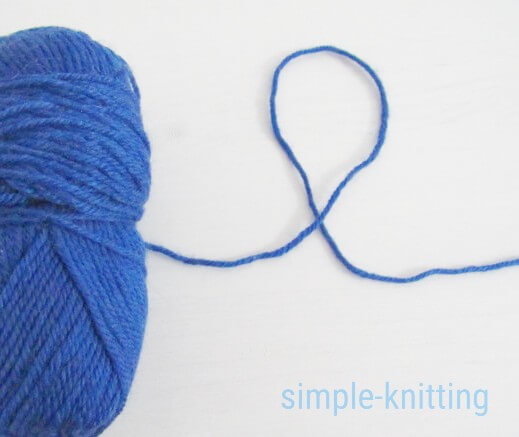
Take a length of yarn about 6 - 10 inches long and make a loop crossing the long end of the yarn that's attached to the ball, over the shorter end to create the loop.
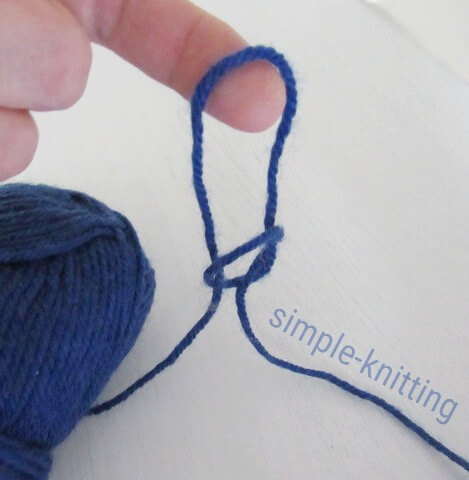
Next, lift that loop over to the yarn attached to the ball of yarn
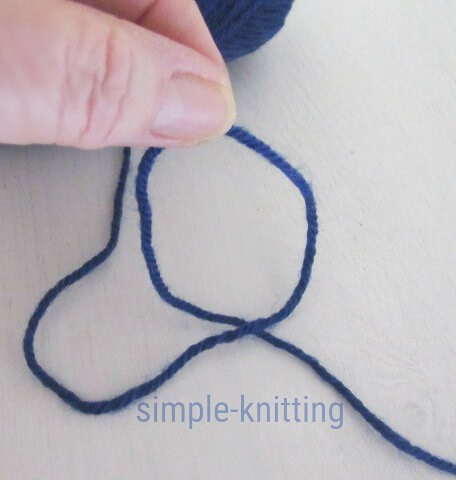
Just like in this photo here. You need it to be over the yarn attached to the ball. (You see that's going to become the slipknot.
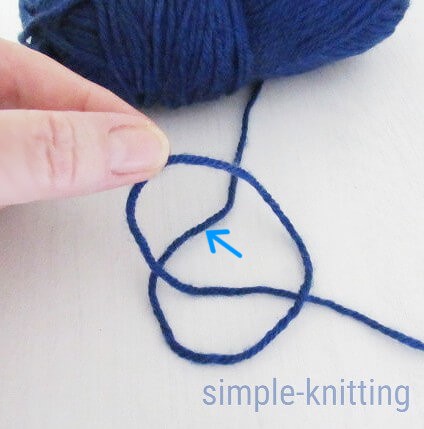
Now all you do is put your knitting needle through that piece of yarn in the center, bring the needle up a bit and snug it up to the needle - not too tight now.
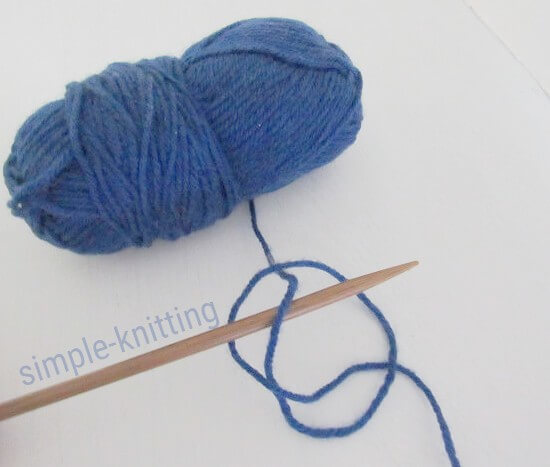
There you have it a nice slip knot, see how the end on the right is attached to the ball and the other end is just the end piece of the yarn.
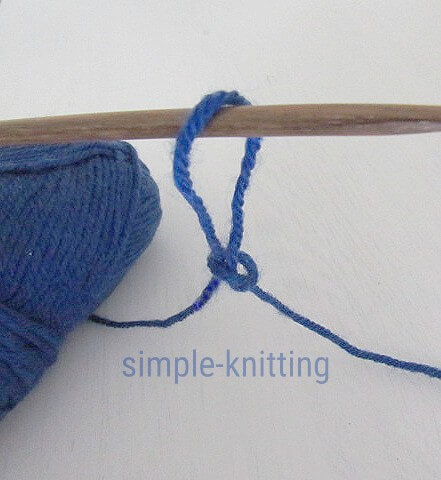
Now just pull the end so that the loop snugs up nicely on the needle. Not too tight.
And that's all there is too it. Simple right?
Now you're ready to learn how to knit starting with casting on the rest of your knitting stitches.
My casting on knitting page will show you three easy cast on methods so you can choose the one you like best.
You might even want to try them all while you're at it. After all it's nice to have alternatives.
Go slowly and enjoy. Happy knitting!

Comments