- Home
- Easy Knitting Patterns
- Turtleback Sweater
Turtleback Sweater - Easiest Sweater You'll Ever Knit
The turtleback sweater knitting pattern is just great for beginning knitters and all knitters who want an easy knitting project. You've just got to try this.
As you may know I am always on the look out for simple knitting patterns for beginners. It means a lot to me that you have a great start with your new hobby.
So I just love it when I come across something that will help you feel like a knitting superstar.
Heck if you can get started knitting with simple, pretty knitting accessories just think of all the things you can make as you improve your knitting skills.
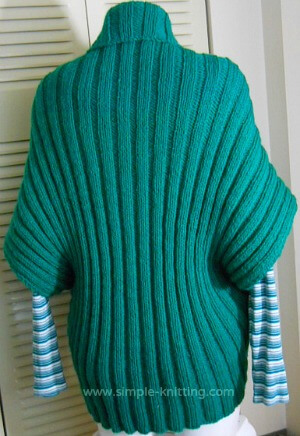
And the turtleback sweater - back view

The
most important part about knitting this sweater is to make it stretchy by using various rib stitches or stitch patterns.
That way you'll have a nice stretch to them. It'll also give you that form fitting coziness.

And the versatility of this simple little pattern is limited only by your imagination.
For instance make it really short for a little shrug or make it much longer if you want to be wrapped up in coziness.
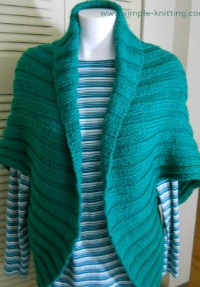
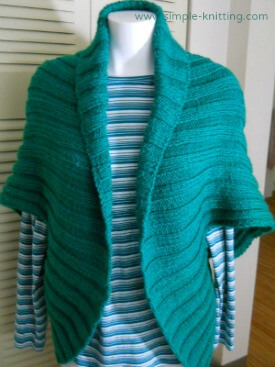
Dress it up with a beautiful lace knitting stitch pattern or use a more basic one like I did. I used a 3 X 3 rib stitch pattern to show you how simple it is to make.
How about trying one of these stitch patterns. You'll be so surprised at the transformation each time.
Use a bulky weight yarn to make this a nice quick knit project or use a worsted or fingering weight yarn.
The thing is you can make it any way that you want. So experiment and have fun with it.
How Do You Knit A Turtleback Sweater?
All
you do is knit a square or a rectangle, sew up a couple of small
seams on the sides and there you have it; a lovely cocoon sweater all
ready to enjoy.
For this knitting pattern I will direct you to this lovely lady names Bonnie who has one of the best knitting instructions for how to knit a turtleback sweater.
Turtleback Sweater Details I Made

Yarn: Approximately 1250 yards medium worsted yarn, I used Patons classic wool in color emerald
Needles: Size 8 (5.00 mm) I only used one set of needles
Gauge: Approximately 4 sts per inch. (Note: Gauge is not too important however you will need to have a rough idea of your gauge in order to make a size that fits you)
What would a rough idea be for knitting this turtleback sweater?
I would just take a quick measurement of the widest part of your body and multiply it by your stitches per inch.
Although it isn't necessary you could also add one or two extra inches to make it even more comfortable. Don't worry it won't make it too big.
Here's an example: If your widest point is your bust and your bust is 40" add 1 inch to it. And if your knitting gauge is 4 sts per inch here's the calculation: 41" X 4 sts = 164 sts to cast on.
If you decide to knit the 3 X 3 ribbing you will need to work it over a multiple of 6 stitches. The 164 stitches is not divisible by 6 so choose the closest number that is. In this case it's 162.
Finished Size: It stretches so much it's pretty hard to tell you however I will give you an approximation. 32" X 37" but it stretches way beyond this.
I really hope you enjoy this lovely pattern and all its possibilities.

