- Home
- Knitting Stitch Patterns
- Diamond Brocade
Diamond Brocade Stitch + brocade Hat Patterns
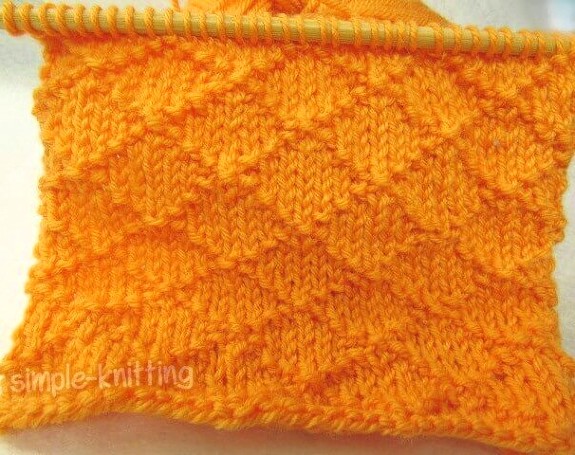
The diamond brocade stitch is a lovely stitch pattern that's easy to knit.
It's made with simple knit and purl stitches and is easy enough for beginners to knit too. So grab some yarn and your needles.
This diamond stitch pattern kind of reminds me of the diamonds you see in argyle socks and sweaters.
It's such a classic design.
More features of the diamond brocade stitch
- The diamond stitch lays flat
- It's an 8-row repeat
- Not reversible
- Simple knit and purl stitches only
- Great for beginners to tackle - come on you can do it. :)
There is one special note to keep in mind with the diamond stitch in order to finish it properly.
After working all the repeats you need to finish your project, end by knitting row 1. Why?
Row 1 puts that one purl stitch at the very top of the diamond and closes it.
And even though the diamond stitch does lay flat it's the kind of stitch pattern that would look great with a seed stitch border around it.
What can you make with the diamond brocade?
You can make whatever your heart wants to make with this pretty stitch pattern. In fact there's a nice pattern I created for you below so you can practice.
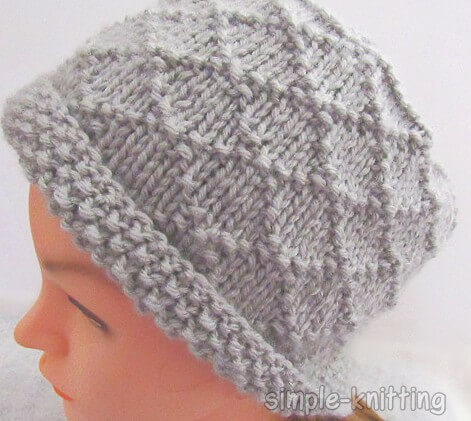
But what can you make? This will look lovely on a knit pillow, blankets and even sweaters and hats.
If you'd like to download the diamond stitch pattern click here
Diamond Brocade stitch Knit flat on straight needles
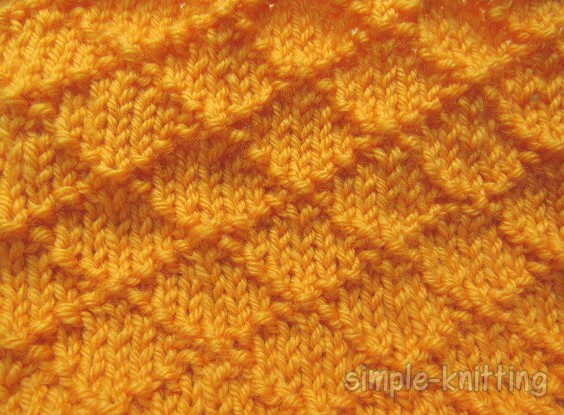 Diamond Brocade Stitch
This is knit over a multiple of 8 sts + 1
If you'd like to knit up a sample you'll need to cast on 17, 25 or 33 stitches
Row 1: (Right Side), K4, *P1, K7; repeat from * to last 5 sts, P1, K4
Row 2: P3, *K1, P1, K1, P5, repeat from * end last repeat P3
Row 3: K2, *P1, K3, repeat from * end last repeat, K2
Row 4: P1, *K1, P5, K1, P1, repeat from * to end of row
Row 5: *P1, K7, repeat from * to last stitch, P1
Row 7: K2, *P1, K3, repeat from * end last repeat, K2
Row 8: P3, *K1, P1, K1, P5, repeat from * end last repeat, P3
Repeat rows 1 - 8 for this diamond stitch pattern.
Diamond Brocade Stitch Knit in the round
Please note: The stitch pattern for knitting in the round is knit over a multiple of 8 stitches.
To knit up a sample, cast on 16, 24 or 32 stitches
Round 1: * K4, P1, K3, repeat from * around
Round 2: * K3, P1, K1, P1, K2, repeat from * around
Round 3: * K2, P1, K3, P1, K1, repeat from * around
Round 4: * K1, P1, K5, P1, repeat from * around
Round 5: * P1, K7, repeat from * around
Round 6: * K1, P1, K5, P1, repeat from * around
Round 7: * K2, P1, K3, P1, K1, repeat from * around
Round 8: * K3, P1, K1, P1, K2, repeat from * around
Repeat these 8 rounds to create the diamond brocade stitch pattern on circular knitting needles.
Want a Knitting Pattern Using the diamond brocade stitch?
Here it is!
I wanted you to have an easy knitting pattern to practice the diamond stitch pattern so I made a quickie hat pattern for you.
The best part is this hat pattern is written for either knitting flat on straight knitting needles or knit in the round on circular needles.
The pattern includes both and the choice is all yours. Enjoy!
To download the hat knitting patterns click here
A Jewel Of A Hat Pattern Knit Flat On Straight Knitting Needles
Materials: Worsted (4) weight yarn
Needles: US 9 (5.5mm)
Gauge: 4 stitches = 1 inch
Notes: When I created this knit hat for straight needles I included a selvage stitch at the beginning and end of each row. What it means is, you'll notice that each row begins with a knit stitch and ends with a knit stitch. This will make it much easier to seam.
Let's begin knitting a hat...
Cast on 83 stitches
Work in Seed stitch for 1 inch as follows:
For all rows: K1, p1 across row – this will create the seed stitch
Continue in stitch pattern as follows:
Row 1: K1, * K4, P1, K3 *, repeat between *s to last 2 stitches, K2
Row 2: K1, P1, * P2, K1, P1, K1, P3 *to last stitch K1
Row 3: K1* K2, P1, K3, P1, K1 *, repeat between *s to last 2 stitches, K2
Row 4: K1, P1, * K1, P5, K1, P1 * repeat between *s to last stitch and K1
Row 5: K1, *P1, K7, repeat from * to last 2 stitches, P1, K1
Row 6: K1, P1, * K1, P5, K1, P1 * to last stitch K1
Row 7: K1,* K2, P1, K3, P1, K1 *, K2
Row 8: K1, P1, * P2, K1, P1, K1, P3 * to last stitch K1.
Continue repeating 8-row pattern until your work measures approximately 6 inches from beginning of work and ending by working row 1. Why? Row 1 actually finishes the diamond shape at the top.
The next row will be a wrong side row and a set-up row for shaping the top of your hat.
It will create a row of purl bumps across plus decrease your stitch count to 80 stitches in order to work the crown decreases
Knit 19, K2tog, K19, K2tog, K20, K2tog, K19 -- 80 stitches
Hat Crown Decreases - shaping the top of the hat
Row 1: *K8, k2tog, rep from * to last 10 sts, k6, k2tog, k2 (72 sts)
Row 2: Purl
Row 3: *K7, k2tog, rep from * to last 9 sts, k5, k2tog, k2 (64 sts)
Row 4: Purl
Row 5: *K6, k2tog, rep from * to last 8 sts, k4, k2tog, k2 (56 sts)
Row 6: Purl
Row 7: *K5, k2tog, rep from * to last 7 sts, k3, k2tog, k2 (48 sts)
Row 8: Purl
Row 9: *K4, k2tog, rep from * to last 6 sts, k2, k2tog, k2 (40 sts)
Row 10: Purl
Row 11: *K3, k2tog, rep from * to last 5 sts, k1, k2tog, k2 (32 sts)
Row 12: Purl
Row 13: *K2, k2tog, rep from * across row (24 sts)
Row 14: Purl
Row 15: K2tog across row (12 sts)
Cut yarn leaving 8” tail and thread through yarn needle. Work needle through remaining sts and pull tightly and fasten.
Finishing Hat
Seam up back of hat and weave in ends. Enjoy!
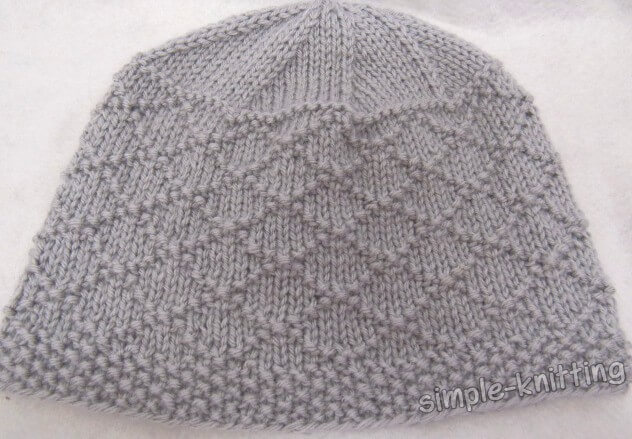
A Jewel Of A Hat Pattern Knit In The Round On Circular Needles
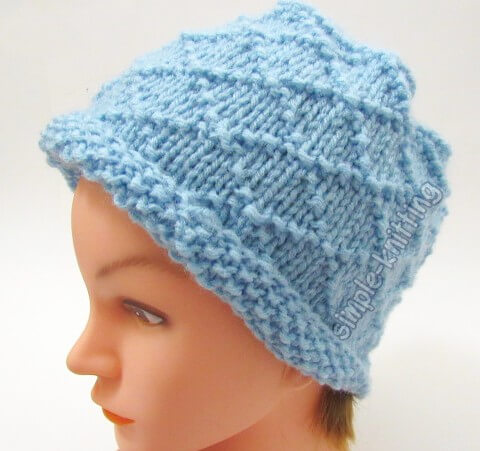 A Jewel Of A Hat Pattern Knit In The Round
Make sure your gauge is still at 4 stitches per inch. My gauge always changes a little when knitting in the round.
Okay let's begin the hat pattern..
With size US 9 (5.5) needles cast on 80 stitches and work pattern as follows:
Work in Seed stitch for 1 inch
How to knit seed stitch over an even number of stitches? Remember you knit the purls and purl the knits as follows:
Round 1: K1, p1 across row
Round 2: P1, k1 across row
Proceed with the pattern as follows:
Rnd 1: *K4, P1, K3 * repeat between *s around
Rnd 2: *K3, P1, K1, P1, K2 * repeat between *s around
Rnd 3: *K2, P1, K3, P1, K1 * repeat between *s around
Rnd 4: *K1, P1, K5, P1 * repeat between *s around
Rnd 5: *P1, K7 * around
Rnd 6: * K1, P1, K5, P1 * repeat between *s around
Rnd 7: * K2, P1, K3, P1, K1 * repeat between *s around
Rnd 8: * K3, P1, K1, P1, K2 * repeat between *s around
Continue following stitch pattern until you reach approximately 6 inches, ENDING with row 1.
Set-Up Round before the hat crown decreaes
Purl around to create a row of purl bumps then continue with crown decreases
Crown Decreases (Switch to double pointed needles as needed)
Rnd 1: *K8, k2tog, rep from * to end of round (72 sts)
Rnd 2 and all even numbered rounds - knit
Rnd 3: *K7, k2tog, rep from * to end of round (64 sts)
Rnd 5: *K6, k2tog, rep from * end of round (56 sts)
Rnd 7: *K5, k2tog, rep from * to end of round (48 sts)
Rnd 9: *K4, k2tog, rep from * to end of round (40 sts)
Rnd11: *K3, k2tog, rep from * to end of round (32 sts)
Rnd13: *K2, k2tog, rep from * around (24 sts)
Rnd 15: *K2tog around (12 sts)
Cut yarn leaving 8” tail and thread through yarn needle. Work needle through remaining sts and pull tightly and fasten.
Finishing Hat
Weave in ends. Enjoy!
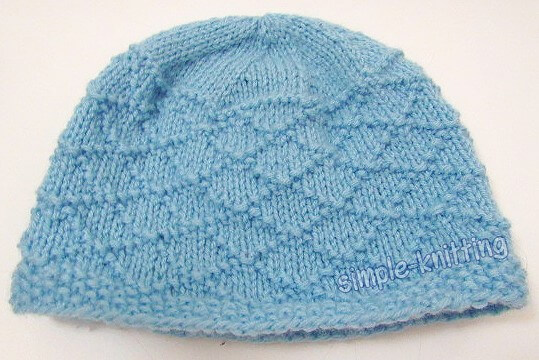
Happy Knitting!
