- Home
- Easy Knitting Patterns
- Knit Hat
Knit Hat On Straight Needles
Have you been looking for an easy knit hat pattern that uses straight knitting needles?
Many people have asked me if you can knit a hat on straight needles so I designed this hat pattern just for you.
And so the answer is, yes you can definitely use straight needles to knit a hat. And I prefer knitting them this way.
This is the perfect beginner hat knitting pattern too because it's super easy to knit.
It uses simple knit and purl stitches throughout. The brim is in a knit 2 purl 2 rib pattern and the body of the hat is in Stockinette stitch.
If you'd like to brush up on how to rib stitches just click on the link and you'll find some easy instructions.
The nice thing about this easy knit hat is that you'll have two fun looks when you're done.
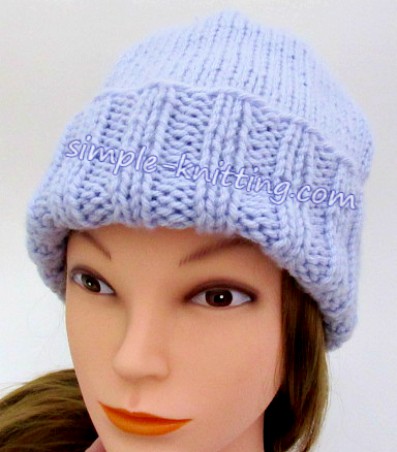
I knit the brim longer so that when it's rolled up it'll keep your ears nice and warm.
And if you'd like to keep the brim down like in this picture, it turns into a nice super slouchy hat pattern. Two hats in one.
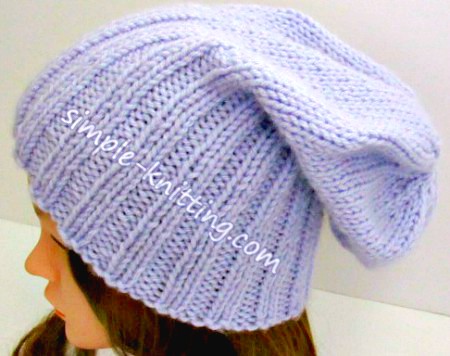
I like the slouchy part on this hat for some reason. I've seen people wearing them like this.
What Does A Knit Hat On Straight Needles Look Like?
The picture below shows you. Please just pretend that my knitting needle is a straight needle.
I always knit with circular knitting needles even when I knit flat.
Starting at the bottom there's the ribbing which will be the brim of the hat and I knit it longer so I can fold it up.
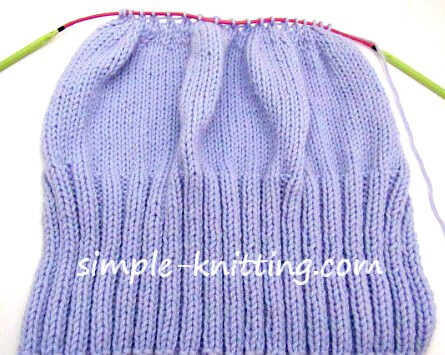
Then I started knitting in Stockinette Stitch until I needed to work the decreases at the crown of the hat.
And still knitting in Stockinette Stitch I made the decreases at the top or crown of the hat.
The last few stitches are usually gathered up together and pulled tightly to close the top of the hat. Then the rest of the hat is seamed.
Basically you'll take the two edges and seam them together to make a tube and that's how it turns into a knit hat on straight needles. It's fun!
And don't worry all the pictures are down below so that you'll know exactly how to seam up your lovely knit hat!
Oh and just before you get to the hat pattern... There's another page I created that will help you with a lot of your hat knitting questions.
There's another page I created that will help you with a lot of your hat knitting questions.
It's my hat knitting tips page and it will help you learn things like:
- how many stitches do you cast on for a hat
- how to measure your head for the hat size, what you need to know
- how long should a knitted hat be before decreasing at the top
- how to figure out the decreases at the crown of the hat
The hat knitting tips page may come in handy when you want to knit a hat without a pattern.
For those of you learning how to knit a hat for the first time you'll get to practice
The links are given in case you'd like to refresh your memory on how to work those stitches.
There are many knitting yarns you can choose for this knit hat. For this hat pattern you'll need to pick up a worsted weight yarn.
Self-striping and variegated yarns might be fun and you may even enjoy using a super soft merino wool.
You can also decorate your hat with pompoms, buttons, fringes and tassels. Just have fun with this basic knit hat pattern.
Knit Hat Pattern Details
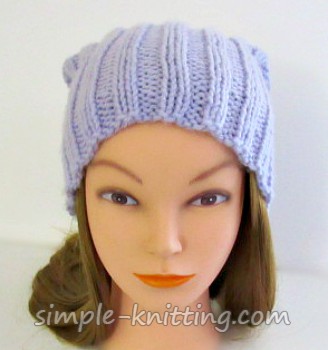
Skills Required: Cast on, bind off, knit, purl, mattress stitch
Materials: Approximately 150 - 200 yards heavy worsted weight yarn, I used Caron One Pound in the color lilac
Needles: Size US 10 (6 mm) and US 10.5 (6.5 mm)
Gauge: 3.75 sts = 1 inch in Stockinette stitch using US 10.5 needles
Abbreviations: K, k = knit, P, p = purl, sts = stitches, K2tog = knit 2 stitches together
Size: Will fit most adults plus it's stretchy
Stitch Pattern: Stockinette Stitch - Row 1, Knit. Row 2, Purl
Notes: Brim is knit extra long in order to turn it up and have the double thickness to keep your ears nice and warm.
Here's the link to download my knit hat pattern
Knit Hat Pattern
With US 10 (6 mm) needles cast on 76 stitches using long tail cast on or whatever method you prefer.
Row 1: Knit 2, purl 2 to end of row
Repeat row 1 ribbing for approximately 6 inches
Switch to larger needles now
Next Row: Using US 10.5 needles begin knitting Stockinette stitch until your work measures 10 inches from the cast on.
Hat Crown Decreases - How to Shape the top of the hat
By the way this knit hat shows you the quicker way of knitting decreases while still keeping the top looking nice.
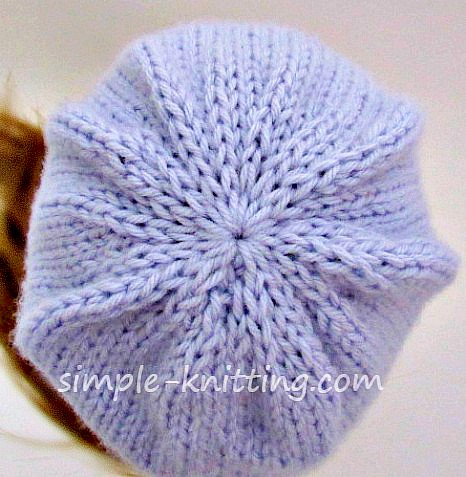
It's fun and simple. And it looks pretty fine to me. So let's get started.
Row 1: *K2, K2tog, repeat from * to end of row. 58 sts
Row 2: Purl
Row 3: *K1, K2tog, repeat from * to end of row. 38 sts
Row 4: Purl
Row 5: K2tog across the row. 19 sts
When you reach 19 stitches continue on to the finishing and seaming below.
Finishing And Seaming Knit Hat
Cut yarn and leave a long tail at least 8 – 10 inches in length.
Thread yarn tail through tapestry needle and work through remaining stitches on needle starting at the opposite end.
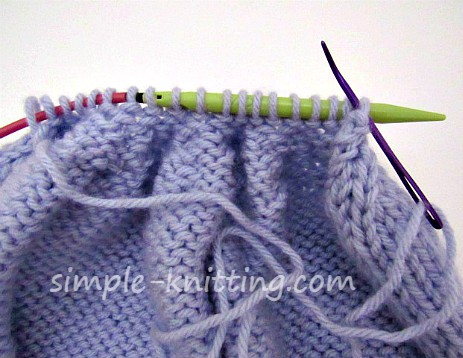
Draw up and pull tightly to close the top of the hat. You can even work the needle through those top stitches a second time to make sure the hat is tightly closed.
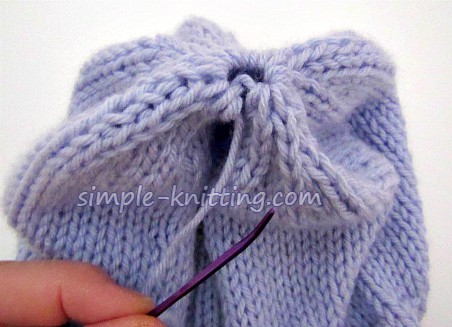
Then continue seaming with the mattress stitch down the back of the hat.
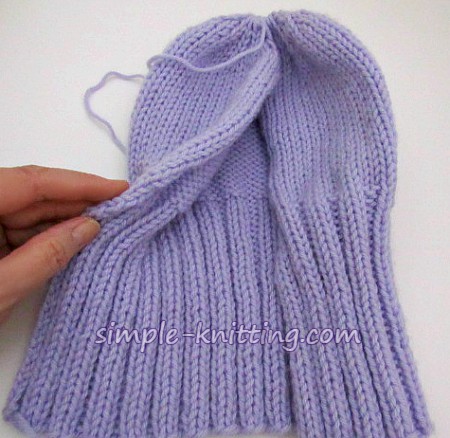
Weave in the ends and simply enjoy!


Comments