- Home
- Easy Knitting Patterns
- Zigzag Hat
Zigzag Hat - Flat Top Hat Knitting Pattern
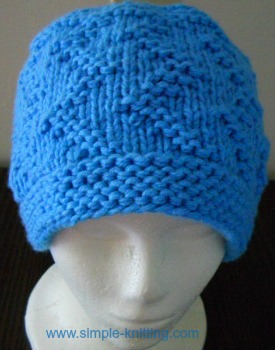
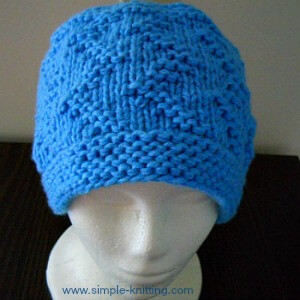
This zigzag hat pattern was really fun to create and knit plus this flat knit hat is a little different.
I made it a flat top hat. I had a knitting idea and had to try it and this easy hat pattern is the result.
It's really fun to knit this one and it's knit on straight knitting needles because I enjoy knitting flat.
I still love knitting hats on straight needles rather than fussing with circulars and double pointed needles.
I knit up two of these hats and my friend took both of them. She loved them.
I had to get one back so I could take pictures of it. It was really cute at the time.
Sadly she wouldn't let me take a picture of her in the hat. But she looked so cute. :)

I kept the zigzag hat pattern simple by using knits and purls.
But then I had a little fun creating the crown of the hat. Just wanted something a little different
It was so fun getting a little more creative and it made the hat more cozy too.
The shaping is done by using the the knit 2 together decrease (K2tog).
It's a very easy decrease in knitting to make the crown of the hat fit better.
Don't worry, there's a link below that will take you to my decreasing stitches page.
I'll show you how easy it is to decrease stitches for this flat top hat pattern.
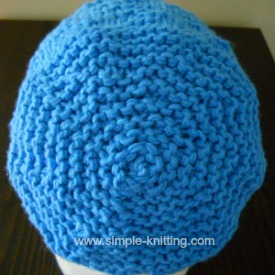
 Back View
See how flat the crown of the hat is? Cool eh? It's so fun too.
This knitted hat pattern shouldn't be too difficult for advanced beginners.
You may like to familiarize yourself with decreasing stitches.
Here's the link for you to check out knit decreases knitwise K2tog
When you're all done then you'll be ready to tackle my zigzag hat.
Click here to download my zigzag hat pattern
Zigzag Hat Pattern Details
Skills Required:
Knit
Purl
K2tog (knit 2 stitches together)
Slip 1 stitch
Sizing: It will fit up to a 23 inch head
Materials: 1 skein worsted medium weight yarn.
Gauge: 3.5 sts and 5.5 rows = 1 inch
Abbreviations: K = knit, P = purl, K2tog = knit 2 together, sts = stitches, Sl 1 = slip 1 stitch as if to knit to right needle
Pattern Notes: I wanted this zigzag hat to be warm and cozy so I held 2 strands of yarn together.
I took one strand from the inside of the skein and the other strand from the outside.
When you knit with the 2 strands just knit as if its one strand.
Or if you prefer you can use a chunky (5) yarn being careful to match the knitting gauge.
Zigzag Stitch Pattern Used
Note: This is the stitch pattern only for the body of the hat.
The beginning of the hat pattern is just below.
Row 1: (WS) and all wrong (odd) side rows: Slip 1, Purl to last stitch, K1
Row 2: Slip 1, *K3, p3; rep from * to last stitch, K1
Row 4: Sl 1,P1, *k3, p3; rep from * to last 3 sts, p2, k1
Row 6: Sl 1, P2, * k3, p3; rep from * to last 2 sts, p1, k1
Row 8: Sl 1, *P3, k3, rep from * to last stitch, k1
Row 10: Sl 1, P2, *k3, p3 rep from * to last 2 sts, p1, k1
Row 12: Sl 1, P1, *k3, p3, rep from * to last 3 sts, p2, k1
Zigzag Hat - Flat Top Hat Knitting Pattern

Holding 2 strands of yarn together cast on 74 sts.
Knit garter stitch for 1 inch
Body of Hat
Work 2 complete stitch patterns (above) for the body of the hat.
Next Row: (WS) Knit
Knit next 2 rows as well.
Work should measure approximately 6" from cast on edge.
Shape Crown
The next 17 rows you'll decrease stitches to make a round flat top for crown shaping.
Each decrease row is followed by a knit row.
Row 1: Slip 1, (K7, K2tog) 3 times, (K6, K2tog) 5 times, Knit 6 66 sts remaining
Row 2: And all alternate even rows knit
Row 3: Slip 1, (K6, K2tog) 3 times, (K5, K2tog) 5 times, Knit 6 58 sts remaining
Row 5: Slip 1, (K5, K2tog) 3 times, (K4, K2tog) 5 times, K6 50 sts remaining
Row 7: Slip 1, (K4, K2tog) 3 times, (K3, K2tog) 5 times, K6 42 sts remaining
Row 9: Slip 1, (K3, K2tog) 3 times, (K2, K2tog) 5 times, K6 34 sts remaining
Row 11: Slip 1, (K2, K2tog) 3 times, (K1, K2tog) 5 times, K6 26 sts remaining
Row 13: Slip 1, K1, K2tog across to last 4 sts, K2tog, K2 15 sts remaining
Row 15: Slip 1, K2tog across row 8 sts remaining
Row 17: Slip 1, K2tog across row 4 sts remaining
Finish Knitting
Cut yarn. Thread yarn into tapestry needle and pull through last 4 sts.
Make sure to put tapestry needle through the last stitch on your needle first. Pull tight.
Seam up and enjoy!


