- Home
- Knitting Stitch Patterns
- OXO Cable
OXO Cable - Cutest Cable Stitch Patterns
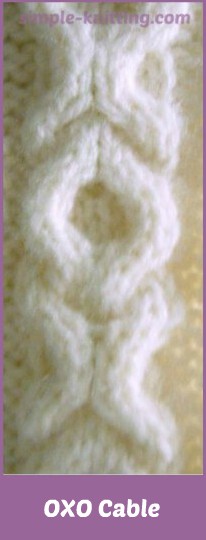
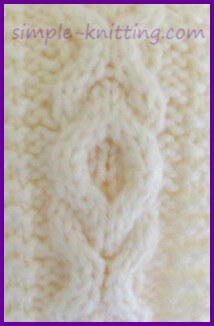
The OXO cable stitch pattern has to be one of the cutest cable stitch patterns I've knitted. And you just have to try it too. You'll love it.
If you're sentimental like I am then the hugs and kisses cable is the perfect stitch pattern to use for your family and loved ones.
Okay, the hugs and kisses cable stitch is more challenging to knit. Honestly? It's not that bad and once you get started it'll get easier.

Besides all that, you can't go wrong if you pull out some scrap yarn and give it a try right? This will be your fun knitting challenge!
And I bet you'll surprise yourself too. It's also fun to watch the pattern take shape as you go along.
The OXO cable stitch pattern would work especially well as a highlight feature such as a border around a blanket or possibly in the center of a knit sweater.
Better yet if you have an open cardigan pattern, you can use this as a border going up the fronts, maybe a border around a hat or in the center of some hand warmers.
You can also try the OXO cable as an allover stitch pattern on something like pillow covers, small blankets. The possibilities are quite endless really.
Since the panel is only 12 stitches wide there are many ways you can incorporate it into your knitting.
And it's definitely a nice way to knit in a special sentimental touch.
OXO Cable Stitch Pattern

OXO Stitch Pattern Notes:
With this knitting stitch pattern you may like to add a few extra stitches to each end of the needle as a Garter stitch border.
You don't have too but it might make it a little easier. I'd add about 5 sts to each side.
The choice is yours and it will definitely work either way you decide to knit it.
With this is in mind, if you'd like to knit a sample without extra stitches simply cast on 12, 24 or 36 stitches.
If you'd like to knit a sample with the extra stitches cast on 22 or 34 stitches.
Remember to always knit 5 sts at the beginning and end of each row. So knit 5 sts, work the pattern row to the last 5 sts and knit the last 5 sts.

OXO Cable Pattern
This pattern is worked over a 12 stitch panel.
Row 1 and 3 (Wrong side): Knit 2, purl 8, k2
Row 2: P2, knit 8, purl 2
Row 4: Purl 2, Slip next 2 stitches (purlwise) to the cable needle and hold at back of knitting, knit 2, k2 off cable needle; slip the next 2 stitches (purlwise) to the cn. Hold on front side. Knit 2, knit 2 off cable needle; p2
Row 5, 6 and 7: As row 1, 2, and 3
Row 8: Purl 2, slip next 2 stitches (purlwise) to the cable needle. Hold on front side. Knit 2 then k2 off cable needle; slip the next 2 stitches (purlwise) to the cn. Hold in back. Knit 2, knit 2 off cable needle; purl 2
Row 9 - 12: Work row 5 - 8 again.
Row 13 - 16 - Work row 1 - 4 again.
Repeat rows 1 - 16 for this pattern
These rows create the 'hugs and kisses' cable
Have fun makings x's and o's. Once you get the hang of it I'll bet it's one you keep coming back too.
OXO Cable Headband Practice Pattern

If you'd like to practice the OXO cable stitch I created this simple OXO headband. Pull out some scrap yarn and have a little fun knitting cables and give it a try.
I created a PDF for the OXO headband pattern to make it easier for you.
OXO Pattern Details
Skills Required: Cast on, bind off, knit, purl, cable stitching,
Materials: Leftover yarn
Needles: Size US 8 (5mm) needles or size US 9 (5.5mm) whichever you're more comfortable using with medium yarn. I tend to use size US 9 needles for worsted weight
Gauge: Not important
Abbreviations: K, k = knit, P, p = purl, st (s) = stitch(es), cn = cable needle
OXO Cable Headband Instructions
Cast on 18 stitches and work patterns as follows:
Row 1 and 3 (Wrong side): Knit 3, Knit 2, purl 8, k2, K3
Row 2: K3, P2, knit 8, purl 2, K3
Row 4: K3, Purl 2, Slip next 2 stitches (purlwise) to the cable needle and hold in back of knitting, knit 2, k2 off cable needle; slip the next 2 stitches (purlwise) to the cn. Hold on front side. Knit 2, knit 2 off cable needle; p2, K3
Row 5, 6 and 7: As row 1, 2, and 3
Row 8: K3, Purl 2, slip next 2 stitches (purlwise) to the cable needle. Hold on front side. Knit 2 then k2 off cable needle; slip the next 2 stitches (purlwise) to the cn. Hold in back. Knit 2, knit 2 off cable needle; purl 2, K3
Row 9 – 12: Work row 5 – 8 again.
Row 13 – 16 – Work row 1 – 4 again.
Continue repeating pattern until you’ve reached the length you need. Usually an inch less than your head circumference will work well and won’t be too loose.
Bind off sts
Finish: Seam two ends together and enjoy!
One more OXO cable knitting pattern for those who love a challenge
And if you're feeling really brave I've also created a baby sleep sack pattern with the OXO cable too. I made it for my granddaughter. You may like to have a look at it.
Happy Knitting!
