- Home
- Knitting Instructions
- Joining Yarn
Joining Yarn In Knitting - How to add new yarn
Joining yarn in knitting is a very simple way of joining a new ball of yarn either in the same color or a brand new color.
I'm going to show you how to change yarn when you need to add a new ball or you want to learn how to change yarn colors.
It's super easy to do because all you're going to do is pick up the new yarn and start knitting with it but let's do it step-by-step with pictures.
After all it's a new technique for you and you want to do it properly right?
So you've come to the end of your old ball of yarn and need to join in a new ball right?
Or maybe you found a knot in your yarn. This happens and I have a couple of ideas on how to deal with them just below. Check it out...
***Important Note About Knots In Yarn***
There may be times that you find some sort of a knot in your yarn. Some people knit them but some don't. Honestly? It's really up to you to decide what you want to do.
But here's a mini checklist:
- Check out the knot.
- Is it barely attached at the ends?
- When you tug on the ends does it almost come apart?
- Is it super thin or scraggly looking like a loose end of some sort?
- Is the knot rather large? If so it will likely work it's way to the front of your finished work.
For all those questions above the answer is to cut the knot out and rejoin your yarn.
On the other hand, if the knot is super small and firmly attached and depending on the kind of yarn you're using, it might be okay to just knit the darn thing.
The choice is yours once again. Knit it or cut it out. Some people will knit them.
Honestly? I don't like to knit them because it will come apart at some point. At the same time I have to be honest and say that I have knit them on occasion.
Not very often but darn it all, sometimes I just want to keep on going...haha We all do right?
So best advice is to check it out thoroughly before you decide and then do the next right thing for you!
And if you decide to cut it out, then you can use one of my super easy basic knitting techniques for joining yarn while knitting.
After all it's one of the best ways to deal with it.
Layout For Joining New Yarn without a knot
In the photo below I want you to have a look at the layout for joining new yarn.
It can be confusing how to place the new yarn. So have a look here.
The new yarn end lies along the left side of the left needle when joining yarn while knitting.
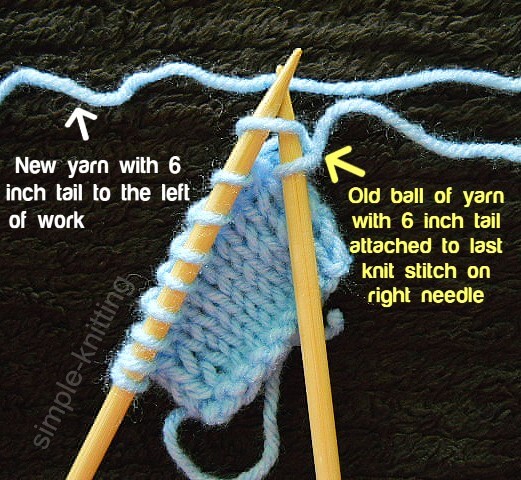 Layout for adding new yarn
Make sure to leave about 3 - 6 inches so that you can weave it in securely.
And just a quick note this join works for Garter stitch too.
Wondering About Joining Yarn In The Round?
The layout is the same if you're wondering about joining a new ball of yarn in the round
The only difference is that you don't have an end of the row. But it still works the same way.
Here's what I do....
Try not to change yarn in the middle of your knitting. What I mean is try to make the join off-center where it's less likely to be noticeable.
Try to get close to where a seam might be like under the arm or off to the side a bit.
That way it's not right in the spotlight where the eyes focus. But if you can't?
Being able to position where you'll be joining yarn isn't always a choice though so do it carefully.
The main thing to watch for is keeping the tension of your stitches the same as you add the new yarn and when you're seaming in the ends of the join.
You may have to fiddle a bit with the stitches a little that's all.
So let's get started...
Joining yarn while knitting
1. Whenever possible, I like to knit the first stitch with the old yarn to keep the seam edge nice and neat.
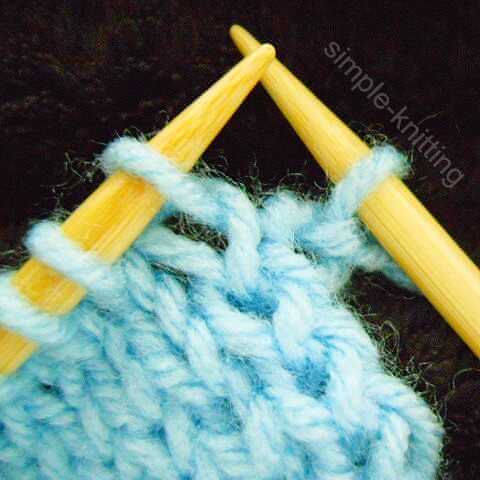
That way you'll keep the seam straight plus it's easier to seam up as well. Mind you it's not always possible to do that.
For instance if you're knitting stripes you'll need to start at the beginning of the row with your new yarn.
Let's keep going....
2. Grab the tail end of the old ball of yarn and the new yarn, wrap both yarns around the right needle and knit it.
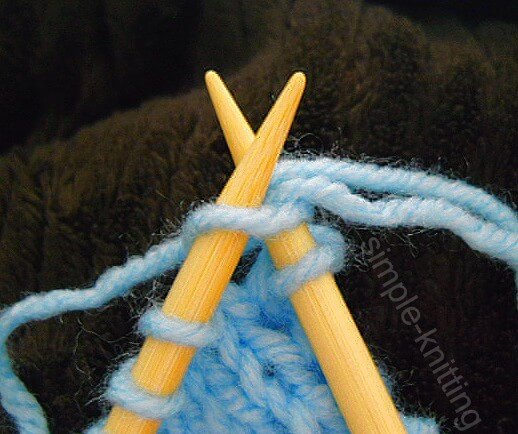
That's right, and it should look like the picture below.
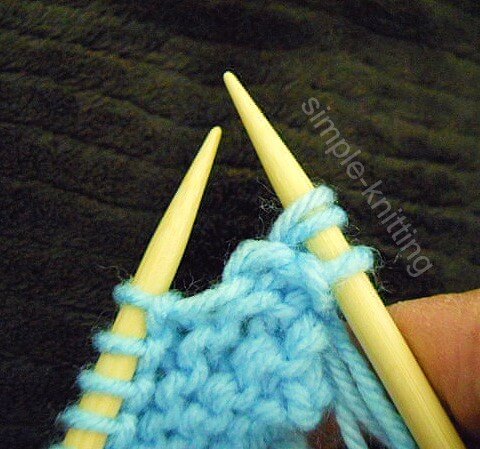
Knit the next stitch the same way using both yarns.
Don't worry if the stitches are loose, it's okay. You can fix it in a minute.
And here you go, these are the two stitches that carry the new yarn. And now you drop the old yarn and continue with the new yarn.
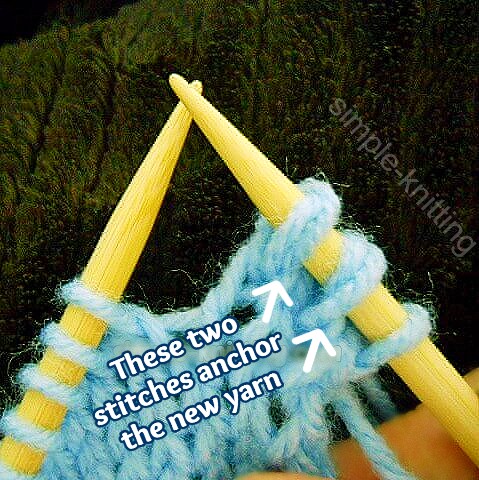
One or two stitches work well with me. And its never come undone. :)
Once you've worked a few more stitches stop knitting and turn your knitting over.
Now you can secure both yarn ends until your finished knitting and there are two ways to try.
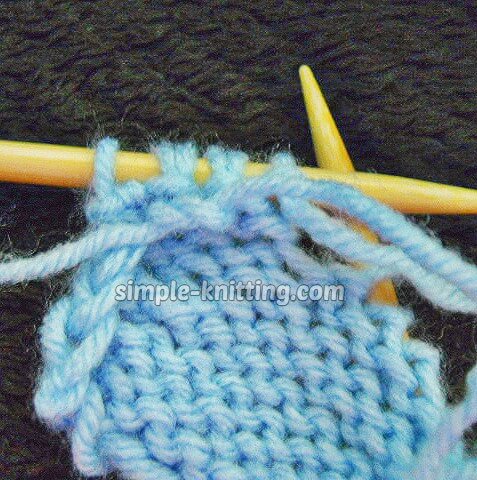
4a. First you can try a half knot like the photo below. Just wrap the two ends like you're going to tie a shoelace.
4b. Or you can make a small bow to fasten the ends together like below. I use this one the most.
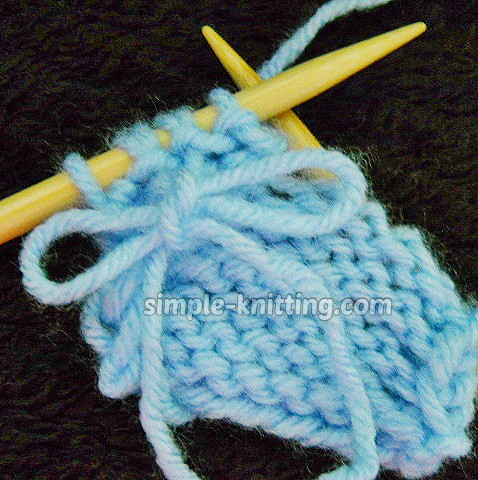
That way the ends will be more secure until you're ready to weave them in.
Now turn your knitting over and continue knitting to the end of the row.
Working The double stitches (joins) On The Next Row
You now know how to join yarn and on the next row you'll secure the new yarn even more.
It's super easy to do. Have a look
5. Begin your next row by knitting or purling depending whether you're knitting stockinette stitch.
Continue knitting across to where the join is of the old and new yarns, the double stitches
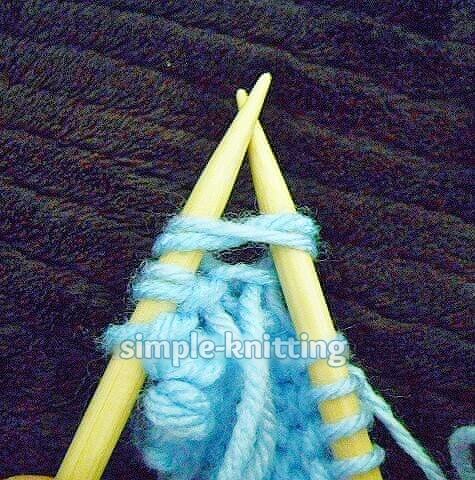
Now if you're knitting then knit the double stitches and if you're purling then purl them.
In the photo above I began to knit the stitch in order to show you.
Joining yarn in knitting and Changing yarn colors
So what happens if you're changing yarn colors? Well that's no problem.
It still works the same way when you're joining new ball of yarn in knitting whether it's the same color or a new color.
Briefly, here's how to change yarn colors
1. Knit to where you want to change yarn colors. Drop the old yarn and start knitting with the new one.
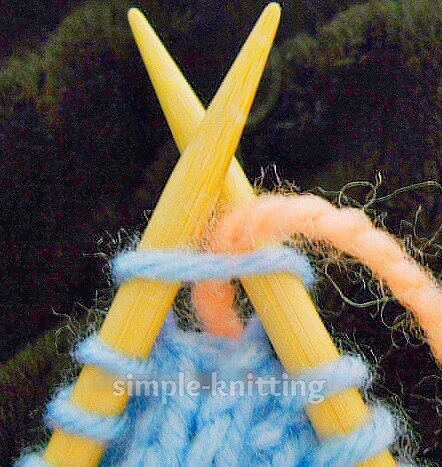
I tend to hold the yarn ends gently in my right hand until I've knitted a couple of stitches.
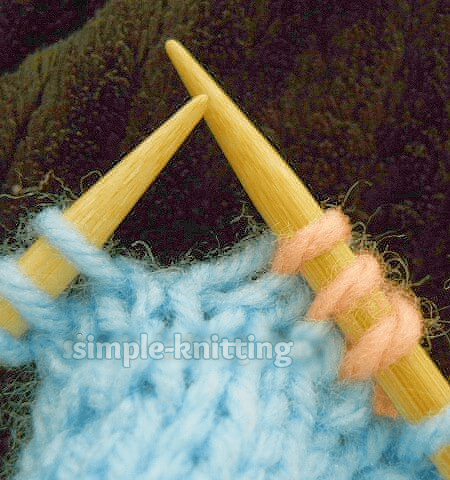
2. Knit a couple more stitches just like the photo below
Then stop knitting and turn your knitting over.
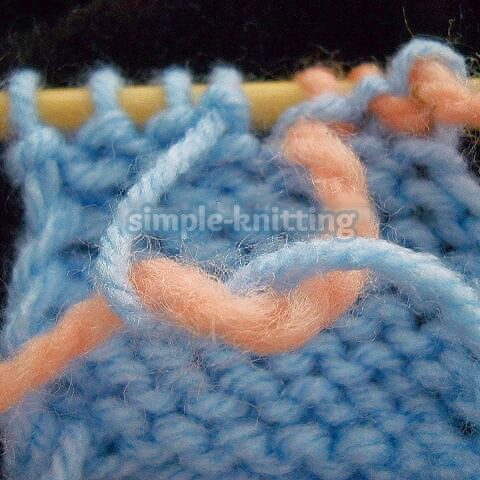
Once again tie a half knot or bow just like we did above with the same color.
That way the stitches won't feel so floppy. And just keep knitting on.
That's all there is to changing yarn colors. It's quite simple right?
Joining Yarn Knitting Tips for Closing Joins
Are you wondering how to close up the joins and weave in all the ends? Let's take a look here..
Okay, have a look at the back of my knitting. This is where I added a new ball.
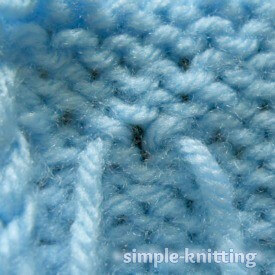
OK, so there's a hole.
Now take the two yarn ends and twist them both around one whole turn.
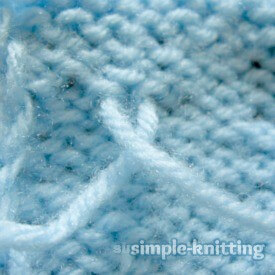
The photo above is part way and the photo below is twisted right around.
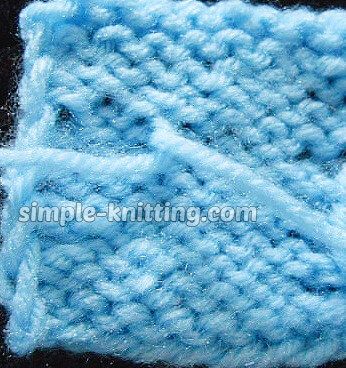
You may need to adjust the tension of your stitches and fiddle with it a bit until it's right.
Then just weave in the ends and you'll be done.
The same color yarn ends will go in the same color part of the fabric if you have different colors.
Here is my same color swatch and I don't think you can tell where the joins were right?
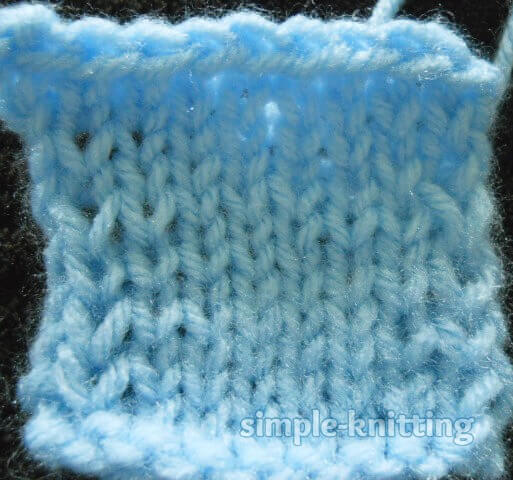
And here is the finished swatch with the new color. It looks good too!
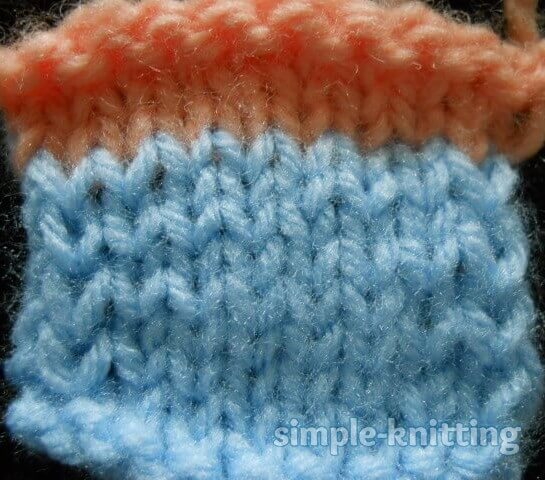
Now it's your turn. You can do this!
Just in case you'd prefer to watch how it's done I found two great knitting videos.
One is using the same color yarn and the other is adding a new color.
Joining Yarn in Knitting With Same Color Knitting Video
Changing yarn colors in knitting - Knitting Video
I hope this helps. Happy Knitting!
