- Home
- Knitting Instructions
- Knit Decreases
Knit Decreases - How to Decrease Knitting
Knit decreases is a knitting technique to remove stitches along your row of knitting.
Basically it's a way to turn two stitches into one stitch and it's very easy to do.
Decreases narrow and shape fabric such as when you need to decrease stitches at the crown of a hat for instance.
Or when you're knitting a sleeve for a sweater and need to narrow the sleeve by knitting decreases.
There are many different ways to knit decreases but for today in this knitting lesson I'm going to show you three.
1. First I'll show you how to knit two together called the K2tog
2. Next up you will learn how to purl two together called the P2tog
3. Last but not least you will learn the slip, slip, knit decrease called the SSK
How to decrease Right in knitting
The knit two together decrease leans to the right so you'll knit a K2tog.
And if you're on the purl side of your work you can purl two together so you'll P2tog. This purl decrease leans to the right too.
how to decrease left in knitting
The slip, slip, knit decrease leans to the left so you will knit an SSK.
The main difference between a K2tog and an SSK is that they lean in different directions. They compliment each other.
You can knit decreases anywhere along your row of stitches. You'll see it often in lace knitting patterns.
And then sometimes they're used at the beginning and end of a row. It depends what you're knitting.
Can you decrease every row?
Yes you can. It all depends on what you're knitting.
A lot of times you'll make decreases on one row and knit one row plain without any decreases. That's also pretty common.
And sometimes you'll start decreasing stitches on every other row and then switch to decreasing on every row.
It really depends on what you're knitting.
Let's get started learning how to decrease knitting.
Knit Decreases - How To Knit Two Together (K2tog)
Please note that the pictures are on top with the instructions just below it. And after each set of picture knitting lessons you'll find a knitting video in both the English and Continental style knitting
Make sure your yarn is at the back of your work.
Holding needle with all the stitches in your left hand, take right needle and insert it through first two stitches from front to back.
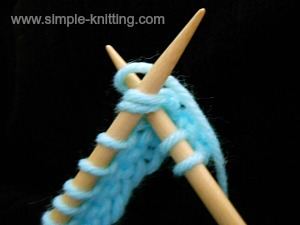
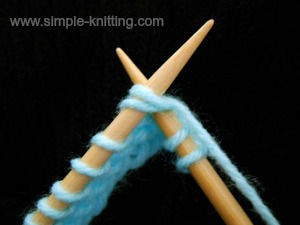
Wrap the working yarn (ball end) around your right needle counter clockwise and snug it up.
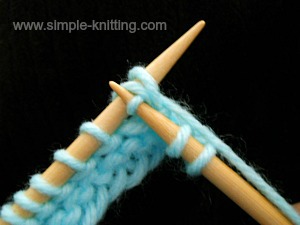
Slowly bring your right needle with the yarn still wrapped around it through the two stitches on your left needle.
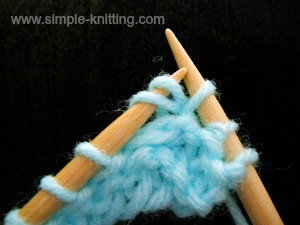
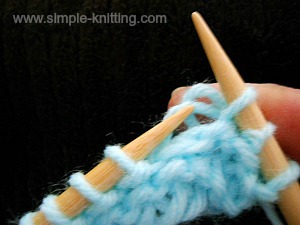
You can drop the two stitches on your left needle. They have just been worked. The new stitch is on your right needle.
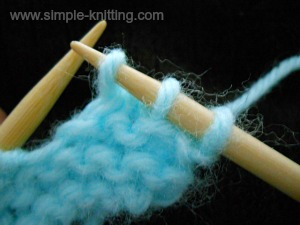
And there you go! That was pretty easy right? This is called knit two together (K2tog)
Knit Two Together (K2Tog)
Knitting Video English Style
Knit Two Together (K2Tog) Video Continental Style
Knit Decreases Purlwise - How to Purl Two Together (P2tog)
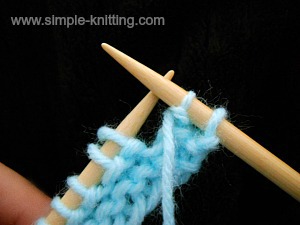
Because you're going to purl stitches make sure your yarn is in the front of your work.
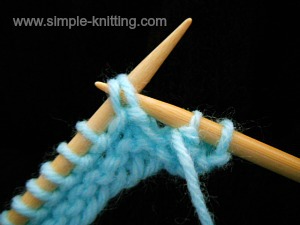
With right needle insert it through the first two stitches on your left needle from back to front.
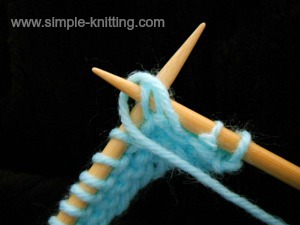
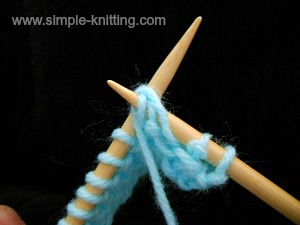
Wrap working yarn around your right needle counter clockwise and snug it up a little.
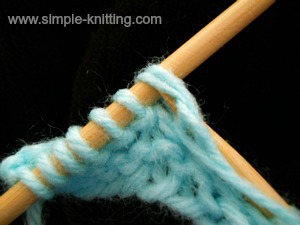
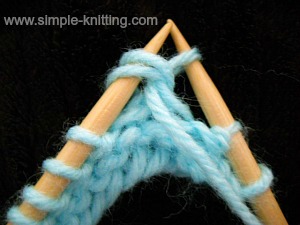
With right needle and yarn wrapped around it slowly bring it through the two stitches on your left needle.
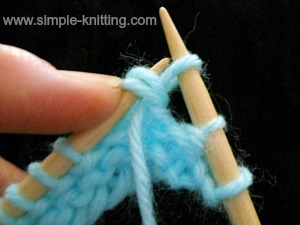
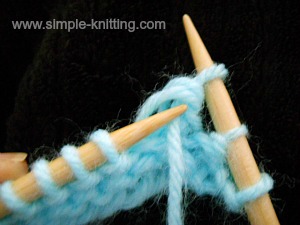
You can slip the two stitches off the left needle, they are worked. New purl stitch is on your right needle.
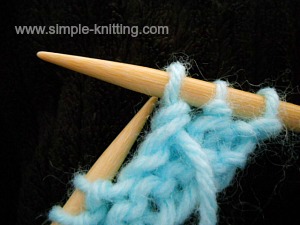
There it is! This is called purl two together (P2tog) and you did it!
How to Purl Two Together (P2Tog)
Knitting Video - English Method
How to Purl Two Together (P2Tog)
Knitting Video - Continental Style
How to Knit the Slip Slip Knit Decrease (SSK)
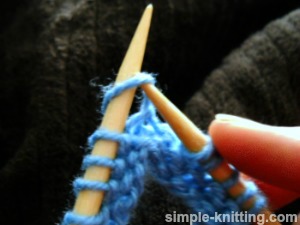
With yarn at the back of your work, insert right knitting needle into first stitch on left needle like you're going to knit it. (knitwise).
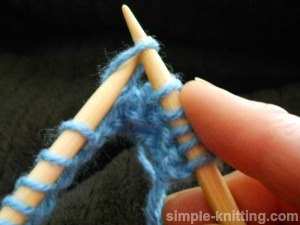
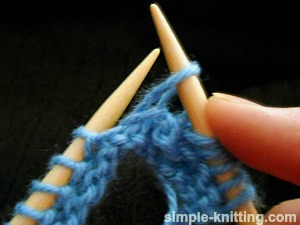
Then without knitting the stitch slip it right over to right needle. Repeat the same process with the next stitch on your left needle.
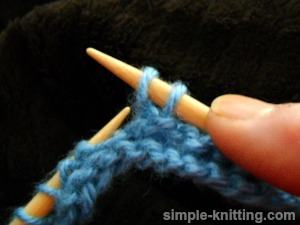
You want to have two stitches (unknit) on your right needle just like the photo above.
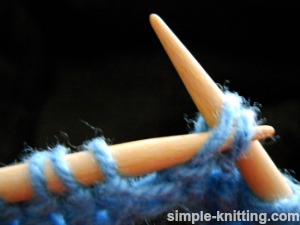
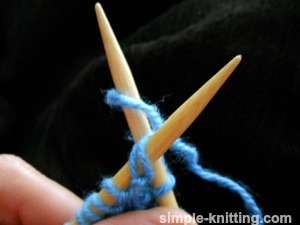
With both stitches on right needle insert your left needle into those two stitches.
 |
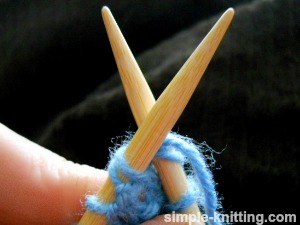 |
Now all you are going to do is knit those two stitches together.
With working yarn (ball end) wrap yarn around right needle counterclockwise and bring it between both needles as in the photo. Snug it up a little bit.
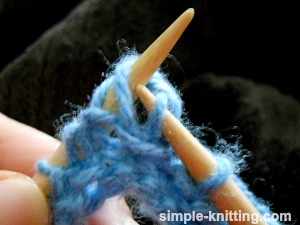
Knit the stitch by bringing left needle up and over your right needle as you draw your right needle through the two stitches.
It's so much easier to do than it is to explain it
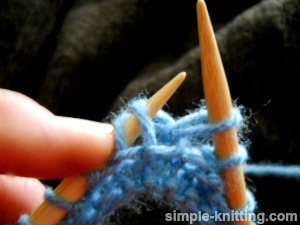
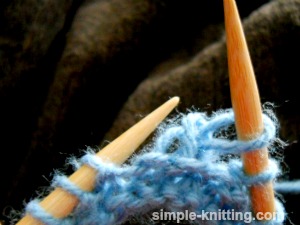
If you look closely at the first photo here you can see how I brought the right needle through the two stitches.
Once you're done you let the two slipped stitches drop off the left needle.
Just in case you aren't sure yet, here is a really quick and thorough knitting video to help you out.
Slip Slip Knit Decrease (SSK),
Knitting Video - English Method
Slip Slip Knit Decrease (SSK),
Knitting Video - Continental Method
How To Knit Decreases Evenly Across Row
Often times in knitting patterns you will come to a part of the pattern where they tell you to knit decreases evenly across your row.
You could figure it out in your head of course but I came across a wonderful website where the calculations can be done for you.
And honestly, I do love keeping it simple.
Head over to this page called World Knits. Enter in a few numbers and you'll know exactly when to knit decreases.
You'll also find a knitting calculator for increasing stitches evenly across a row too.
Now that's simple! I love it.
